Style of the day: Twist-out in Ginza

About  a week ago I decided to take my fabulous twist-out to Ginza. If you live in Tokyo, and have not been there yet, what have  you been waiting for? As for future visitors  to this fine city, a trip to this part of town will leave you mesmerised as you walk the wide open pedestrian shopping zone  (the roads are closed off to traffic on the weekends) where the streets are lined by practically every leading brand name in fashion and cosmetics.  A girly girls’ dream!

Apparently it’s actually possible to find $10 cups of coffee here, so needless to say that Ginza is considered one of the most upmarket shopping, dining and entertainment districts in Tokyo.

Back to my fro though. I was going to opt for my usual braid-out, but when I took the twists down I was thoroughly impressed and decided to stop right there. Carol’s Daughter products lived up to their reputation. My hair was happy.

P1080449

P1080448

P1080480

P1080469

P1080444

Dry hair? Try co-washing for moisturised hair

Co-washing natural hair

Did you know that it is possible to cleanse your hair by skipping the shampoo and using conditioner only? Conditioner washing, commonly referred to as co-washing is  exactly that –  a method of cleansing the hair preferred by many curly girls because of its ability to keep the hair extremely moisturised. Since we already know that water is a naturalista’s best friend, the H2O combined with conditioner create a dream team for detangling and high moisture levels.

How do I co-wash?

Essentially you follow the same process as you would when using shampoo, except that you replace it with conditioner.

Why co-wash?

Most shampoos tend to contain ingredients that are too harsh for the hair. If you’ve ever had that squeaky clean feeling after washing, it’s most likely due to the harsh chemicals which have stripped the hair of not only dirt and product build-up, but also of the scalp’s natural oils (sebum) which can lead to severely dried out tresses. These ingredients include, but are not limited to parabens and sodium laurel sulphate. The sebum already has a harder time reaching the ends of the hair due to navigating the curls’ twist and turns, so this really isn’t good if you’re trying to keep your strands moisturised. No need to add fuel to the fire by stripping your delicate curls  of it protective sebum. 

It is also many naturalistas belief that conditioners contain a small amount of gentle cleansers and that they can and should be used more than shampoo to clean curly hair.

There are a few ways that you can incorporate co-washing into your regime. You can kiss shampoo goodbye completely and only use conditioner, or you can co-wash in between shampoos to freshen up your hair so you don’t have to shampoo as frequently.

Benefits of co-washing

  • Hair remains moisturised for longer.
  • Additional conditioning may help with breakage.
  • Contributes to more bouncy and shiny hair.

Downside of co-washing

  • It may be needed to wash more frequently because shampoo is not being used.
  • It is easier for product build-up to occur on the scalp and hair.
  • Frequent use of conditioner can cause hair to feel stringy and ‘mushy’.

I’d suggest co-washing with a light rinse-out conditioner as deep conditioners tend to me more rich in texture as well as more expensive, so it’s best to  save your luxury products for the deep treatment moments. And if you’ve decided to make co-washing a regular part of your routine, try to avoid products that contain silicones. These ingredients are generally easy to identify on product labels as they end in -cone. Many silicones are synthetic additives that are not water-soluble, making them a little bit harder to wash out without harsh detergents. The end result is yucky build-up on your hair and scalp, and that’s something that no one should have to deal with.

If you don’t want to cut out shampoos completely, I would suggest using any shampoo that’s made  of natural ingredients. I’ve been using Aubrey Organics shampoos and conditioners for quite a while as my staple products and love that my hair has responded to it so well.

As for co-washing, it really does serve as a solid foundation for moisturised hair. If you’ve been struggling with extra dry hair, give this technique a try.  You can only end up with happy and healthy hair.

xxx


7 ways to rock a TWA

You’ve decided to return to your naturally curly texture by growing out your relaxer. You’ve even decided to transition for as long as you can in the hope that by the time you do have to cut off the relaxed ends, your natural hair has started to grow in substantially. So you start the process.  A few months down the line, you realise that managing the two textures is more hassle than it’s worth. With nervous excitement, barely a few centimetres long you go ahead and do the big chop. You expose your teeny weeny afro (TWA) to the world by cutting off the chemically processed ends. Congratulations – you did it!

And just to make sure you’re not at a loss for styling options, I’ve searched the net for some cute and feminine ways to sport your new do.

Wear your afro as is

Nothing exudes confidence as  much as a woman showing off her beautiful facial features with pride.

TWA-AsIs

TWA-Asis2

Cutesy headband and bow

Go for a funky blonde and pretty it up with a headband and bow.

TWA-ColouredWithHeadbandAndBow

Frohawk

I adore this style. Simply put the sides of your hair up towards the middle and secure with bobby pins. Voila – you’ve got yourself an afro mohawk.

Pinned to one side

This is particularly feminine. Pin one side of your  hair up, secure with bobby pins and you have a chic little semi up-do.

TWA-PinnedOnOneSide

Side-path

Create a side-path in your TWA for a touch of instant glam, Solange Knowles style.

TWA-SidePath

Scarf

Simply tie a scarf around your TWA and tie it into a bun at the back. Beautiful.

TWA-Scarf

Actress Lupita Nyong’o

Need even more inspiration? Take a cue from actress Lupita Nyong’o and really get creative with your fro.

TWA-LupitaNyongo

Image source: Pinterest

Style of the Day: Ueno Wash & Go

This weekend I decided to revisit a style that I had not worn in a very long time: The Wash & Go. Since this is a style that involves lots of shrinkage, I’ve been opting to wear stretched curls in the form of twist-outs and braid-outs most of the time. But since I was short on styling time this weekend, I decided to give this old favourite a go. And I must say, it didn’t turn out half bad.

These pictures were actually taken on second day hair when my fiancé  and I decided to spend the day in Ueno Park, a beautiful outdoor green space in central Tokyo. Following  some unwinding in the park, we headed for the big market across the street in search of some bargains.

P1080324 P1080330P1080333 P1080374 P1080414 P1080423 P1080433

How I achieved this style

As I mentioned before, I was really short on styling time so I even had to skip my usual pre-poo and deep conditioning sessions (oh horror). So I simply co-washed my hair with Herbal Essences Hello Hydration conditioner, after which I applied Aubrey Organics Glycogen Protein Balancing conditioner to allow for quick conditioning and detangling. When it came to styling time, I applied Cantu Shea Butter Leave-in Conditioning Repair Cream as my leave-in, sealed it with coconut oil and finished it off with a bit of Aubrey Organics Aloe Vera gel. My strands took about 2 hours to dry. For bedtime I pulled all my hair into a high loose ponytail, also known as pineappling, and wrapped a silk scarf around my head to protect my hairline. The next morning I just took the ponytail down and shook it all loose. I was good to go.

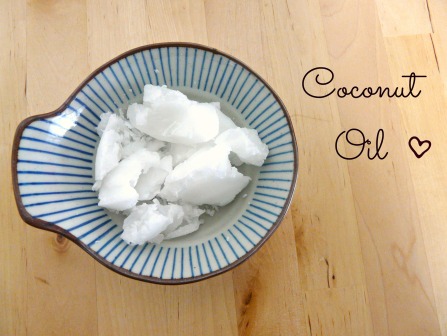
Coconut oil for radiant skin

Coconut Oil

I heart coconut oil.

One of the most important discoveries I’ve made in the last year is that coconut oil does not just work miracles on hair, but that it is excellent for the skin too. I’ve mentioned before  (over here ) that my hair really took a beating in the dry Japanese winter, but added to this is that my skin also suffered.

I’ve since started using coconut oil on my skin as a natural moisturiser in addition to using it on my hair, and I’ve not looked back. Here are the ways I’ve been using it to obtain soft and supple skin.

Moisturising my dry hands

You know how dry your hands can get just after you’ve washed the dishes? Well, alleviate it by washing your hands with a nourishing and moisturising hand soap and pat dry. Follow it up by rubbing a small coin-sized amount of oil between your hands to warm it up and melt it if it’s hard, and gently massage it into your hands.

Moisturising my body

Straight out of a hot bath or shower, while my skin is still damp, I’ll rub coconut oil all over my body. I find that if I rub it in while my skin is still damp it absorbs a lot easier and keeps my skin moisturised for much longer.

I’ve also recently started the oil cleansing method. So far so good, and I’ll do an update on that in the near future, but suffice to say that coconut oil has honestly turned into somewhat of a miracle substance for me. It leaves my skin soft, moisturised and supple, and not to mention smelling heavenly. I honestly don’t know if I’ll ever look at any commercial moisturiser in the same way again.

Simple protective styling for ultimate length retention

High Bun, Protective Style

Choose a bun for simple protective styling.

We are finally seeing a glimpse of Spring  here in Tokyo and with that I’ve been reflecting on how much my hair has grown over the last year that I’ve proactively been caring for it. Protective styling has definitely been a major contributor to this and my hair couldn’t be happier. The longest strands on my head is now bra-strap length. Say what? Never in my life have I had hair this long. This is all due to  a combination of keeping my hair moisturised and in protective styles i.e. keeping the fragile ends wrapped up and shielded from the elements.

There are some great protective styles, such as box braids and twist extensions, wigs, weaves and mini-twists, but if you are someone like me who likes to keep things simple, here is my protective styling regime that has ensured a head full of longer and stronger strands. Follow these steps for fabulous hair.

Cleansing and deep conditioning 

Wash your hair in sections and twist each one up before you move on to the next.

Styling

Twist / braid your hair up and let it air dry. Don’t twist /  braid all the way to the very ends as this can cause knotting and eventual breakage. Simply coil the ends of your hair around your finger.

Simple everyday protective styles

1. Wear your twists as is. Pretty them up with a cute bow, hair clip or scarf.

2. Scoop all your twists up into a ponytail, or bun it up for a double dose of protection.

Once your hair has dried a day or two later feel free to undo the twists (or keep them in for however long works for you). Following that change up your look and wear a different protective style.

3. Wear two braids on either side of your head. This is how I achieve my knock-out braid out.

4. Pull all your hair into one big massive top-knot bun.

5. Do two jumbo flat twists on either side of your head and tie it all into a low bun close to your neck.

6. Wrap all your hair into a bun and tie a scarf around it.

These styles can all be achieved in a matter of minutes. I literally only have 10 minutes to do my hair in the mornings before work and these are the styles I usually opt for. The times when I stupidly only give myself 5 minutes (darn those extra 10 minutes in bed) I’ll settle on the high bun. (I’m a nursery teacher so I find it best to keep my hair up and out of my face in any case.) I realise there’s nothing elaborate about these styles, but they definitely work. So try these quick and easy ways to ensure hair that is protected, looking chic and most importantly, retaining length.

Let me know what your protective styling regime is and how it’s working for you.

xxx

Image Source: Pinterest

Carol’s Daughter has just arrived in the mail!

Carols Daughter Group Shot

Look what has just been delivered to my front door – a complete arsenal of Carol’s Daughter hair products! I couldn’t be more ecstatic if I tried. To say that I’ve been waiting in anticipation for this delivery for the last 3 weeks would be huge understatement.

I’ve been toying with the idea of ordering  a range of curly hair products for a couple of months now, but was trying to decide which brand to go for. So imagine my surprise when I was on the Carol’s Daughter website one lazy Saturday morning, when I noticed the link on the top left hand corner that they now deliver worldwide. Well of course I was beside myself, and immediately whipped out my credit card (I’ve been saving up for this moment for months, you see.)

I’ve watched and read so many Carol’s Daughter reviews on YouTube and on blogs, so had already been convinced for ages that I wanted to give this brand a try at some point.  So after considering my budget, I settled on the following 7 products.

Hair Milk Deep Moisture Curl Set –  $42.30

It consists of the following:

Hair Milk Cleansing Conditioner

Hair Milk Leave-in Moisturizer

Hair Milk Pudding

Monoi Repairing Hair Mask – $28.80

Black Vanilla Moisturizing Hair Smoothie – $12.60

Black Vanilla Moisturizing Leave-in Conditioner – $12.60

Marguerite’s Magic Restorative Cream Hairdress – $11.48

I ended up paying in Great British Pounds, so with international shipping fees included it all came to a total of £123.16, or R2 200 if you’re a South African reading this. A small fortune I know, but if you consider that I live in a place that exclusively caters to asian hair, you’d probably pull out all the stops too.

I can’t wait for wash day to roll around and honestly feel like a child in a sweet shop trying to decide which product(s) to use first – whoohoo! So expect lots of product reviews in the coming weeks.

Have you ever  used Carol’s Daughter? If you have let me know how it’s worked for you.

xxx

My hair loves Mixed Chicks leave-in conditioner

Mixed Chicks Leave-In

Many of us who live in places where products for naturally curly hair aren’t easily accessible learn to make due with the few resources we have at our disposal. But every so often we, or at least I, decide to bite the bullet and place that rather pricy online order to have a product that we’ve been lusting over shipped across the waters. My first such purchase was for the Mixed Chicks leave-in conditioner, which I had been reading about for absolute ages. I was desperate for a lightweight leave-in and decided to give this product a go. I bought the conditioner in August last year on amazon.co.uk and luckily a friend who came to visit from England was able to bring it over for me.

My hair loved the product from the moment I applied it.

What it says

  • “Finally, a curl defining formula for ‘us’. Whether you’re black, white, asian, latin, mediterranean or any glorius combination of the above, you’ll love the way this alcohol-free non-sticky, lightweight product leaves your hair inviting to touch as it defines and locks moisture into every curl.”
  • Controls frizz.
  • Cruelty free and vegan.

What it does

  • It really is as lightweight as it claims to be.
  • It absorbed into my hair easily.
  • It helped with the detangling process.
  • My curls were really soft and moisturised for days afterwards.
  • It didn’t weigh down my curls at all.
  • It has a subtle floral aroma.
  • Price:  £13 / R233 / $22 for 300ml, which I think is reasonable. (Actually it sounds hideous in South African Rand, but oh-so-worth-it for my strands.)

All in all, my hair really loves this product, and because it’s so lightweight, it leaves my curls soft and bouncy. I cleansed and deep conditioned my hair as I usually do, and only applied a small amount of leave-in to each section. I sealed with coconut oil before I put my hair into chunky twists to air-dry over night.

And voila! I can definitely see this product becoming a staple during the hot and sweltering Tokyo summer.

Disclaimer: This is not a sponsored review. 

Style of the Day: Chic Head Wrap

Head-wrap

If you’re looking for a feminine and chic way to protect your tresses from the elements, a head wrap is the perfect way to achieve this. It also happens to be a  ridiculously easy to way to hide a bad hair day, or to hide your hair while you are setting it for a particular style.

Before heading out I decided to wrap my hair up in this double scarf over the weekend as I had just washed my strands and put it into several chunky twists to set it. I felt ever so stylish out and about in town.

xxx